

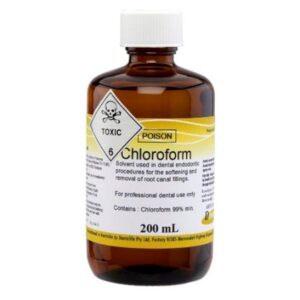
Other modifications on CTAB eliminate the use of chloroform, and you can look it up online.
DNA Extraction General considerations tips and tricks.
General: A high yield, high quality/purity Plant DNA extraction consists of few stages:
Plant tissue collection
We are often asked by partners and customers:
How to collect leaf samples for DNA extraction?
What sample size?
What kind of leaf punching tool do we recommend?
Here are some general answers:
Collect always the smallest and youngest leaves that you can find. Someone taught me that a mature leaf has almost the same number of cells as when it was young. Therefore, there is the same amount of DNA in young small leaves, as in the larger, and more mature ones. The larger leaves contain both more water and inhibitors.
The worst strategy will be punching a small whole in a big leaf.
The leaf punching tools are also very hard to clean between punches, so you either end up trying to clean them again and again, wasting your time, and/or worst: carrying over leftover tissue from sample to sample, causing cross-contamination.
Hence, we do not recommend the leaf punching tool!
You can use tweezers and clean it (water/alcohol) between each collected sample.
Seeds and or leaves?
We found that working with seeds is possible. Nevertheless, it is a problematic tissue:
We prefer working with germinated seeds or leaves.
Dry or fresh tissue?
It is possible to work with both. We found it easier crushing the dry tissue.
Crushing
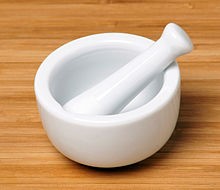
Crushing leaves one by one using a Mortar and pestle: It is possible, yet way impractical for high or even medium throughput.
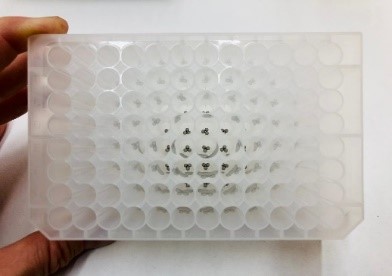
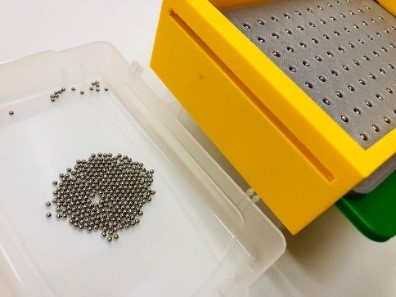
Crushing with steel balls in 96-well format is now considered a kind of an industry standard.
We use a Retch 96-well bead beating machine. It is the same as the Qiagen TissueLyser machine.
https://www.qiagen.com/us/products/human-id-and-forensics/automation/tissuelyser-ii/
In our DNA extraction method, we optimized the steel ball diameter and number of balls used, and which 96-well plates to use. This optimization is very important, you want to crush the leave without cracking the 96 well plate. Using low quality plates with too big balls can do just that.
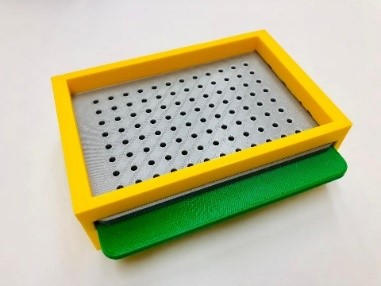
For dispensing the steel balls into the 96-well plate, we use a cool tool we have developed.
 |
 |
 |
 |
Chemical Lysis
We use a lysis buffer that is modified from a published protocol. It contains among other things Proteinase K enzyme and requires a very short incubation step.
Precipitation-separation-purification.
After the lysis of the plant tissue, almost all protocols have a precipitation step with an acidic buffer. We use a modified recipe, 1:1 between the lysed tissue buffer, a cold incubation step, followed by a long centrifugation step using the 96-well plates centrifuge top speed.
In this step mainly debris are precipitated we take the clean and clear supernatant for further purification.
DNA Purification
For a long time, we used special DNA binding filter plates for purifying the DNA.
This is the same kind of bind-wash-elute columns, only in a 96-well format.
https://shop.pall.com/us/en/products/zid8132
We used it with modified buffers, and a protocol for binding the DNA into the plate, then washing the plate with wash buffer, then ethanol, and finally elute the DNA from the plates into a 96-well plate.
This type of purification produces a very clean, clear, and low-salt DNA, with a decent yield: 0.1-0.5ug.
The problem was that during the covid19 peak, we could not purchase these special DNA-binding plates.
We instead optimized a second protocol, omitting the use of the DNA-binding filter plate, and instead doing a 2-step precipitation with Isopropanol, then Ethanol.
The DNA yield and purity are very good, even better than with the use of the bind-wash-elute filter plates, but I am sure there are more salts present in the DNA.
DNA Elution and preservation: Water or TE?
For sure PCR grade Water!
Why not TE?! The reason TE was used in past protocols, was to preserve the DNA from DNA-degrading DNAse enzymes. TE Tris-EDTA, contains EDTA, as google explains:
EDTA (ethylenediaminetetraacetic acid) is a chelating agent that binds divalent metal ions such as calcium and magnesium. EDTA can be used to prevent degradation of DNA and RNA, and to inactivate nucleases that require metal ions. EDTA can also be used to inactivate metal ion-requiring enzymes. The problem is that this EDTA, also blocks/inhibits PCR enzymes. So, our advice, use PCR grade water.
By the way, the quality of your water, and the water you dissolve the primers, and insert in the PCR, that water quality is most important.
Pipetting
We expanded on this subject in the past.
https://www.linkedin.com/pulse/automated-liquid-handling-dagan-mor
We use now a 96-channel Gilson pipette, and after some optimization of the method, because of the limitations of volumes, it has become very satisfactory.
As mentioned, there are quite a few commercial kits out there, that all have advantages and disadvantages.
If you are interested in applying our DNA Extraction methods as ready-to-use kits, we now offer them as ready to use kits.
Gene-G XTR01 Version 01: Reagents, with DNA-binding filter plates.
Gene-G XTR02 Version 02: Reagents.
Gene-G BeaDispenser 96 2mm